
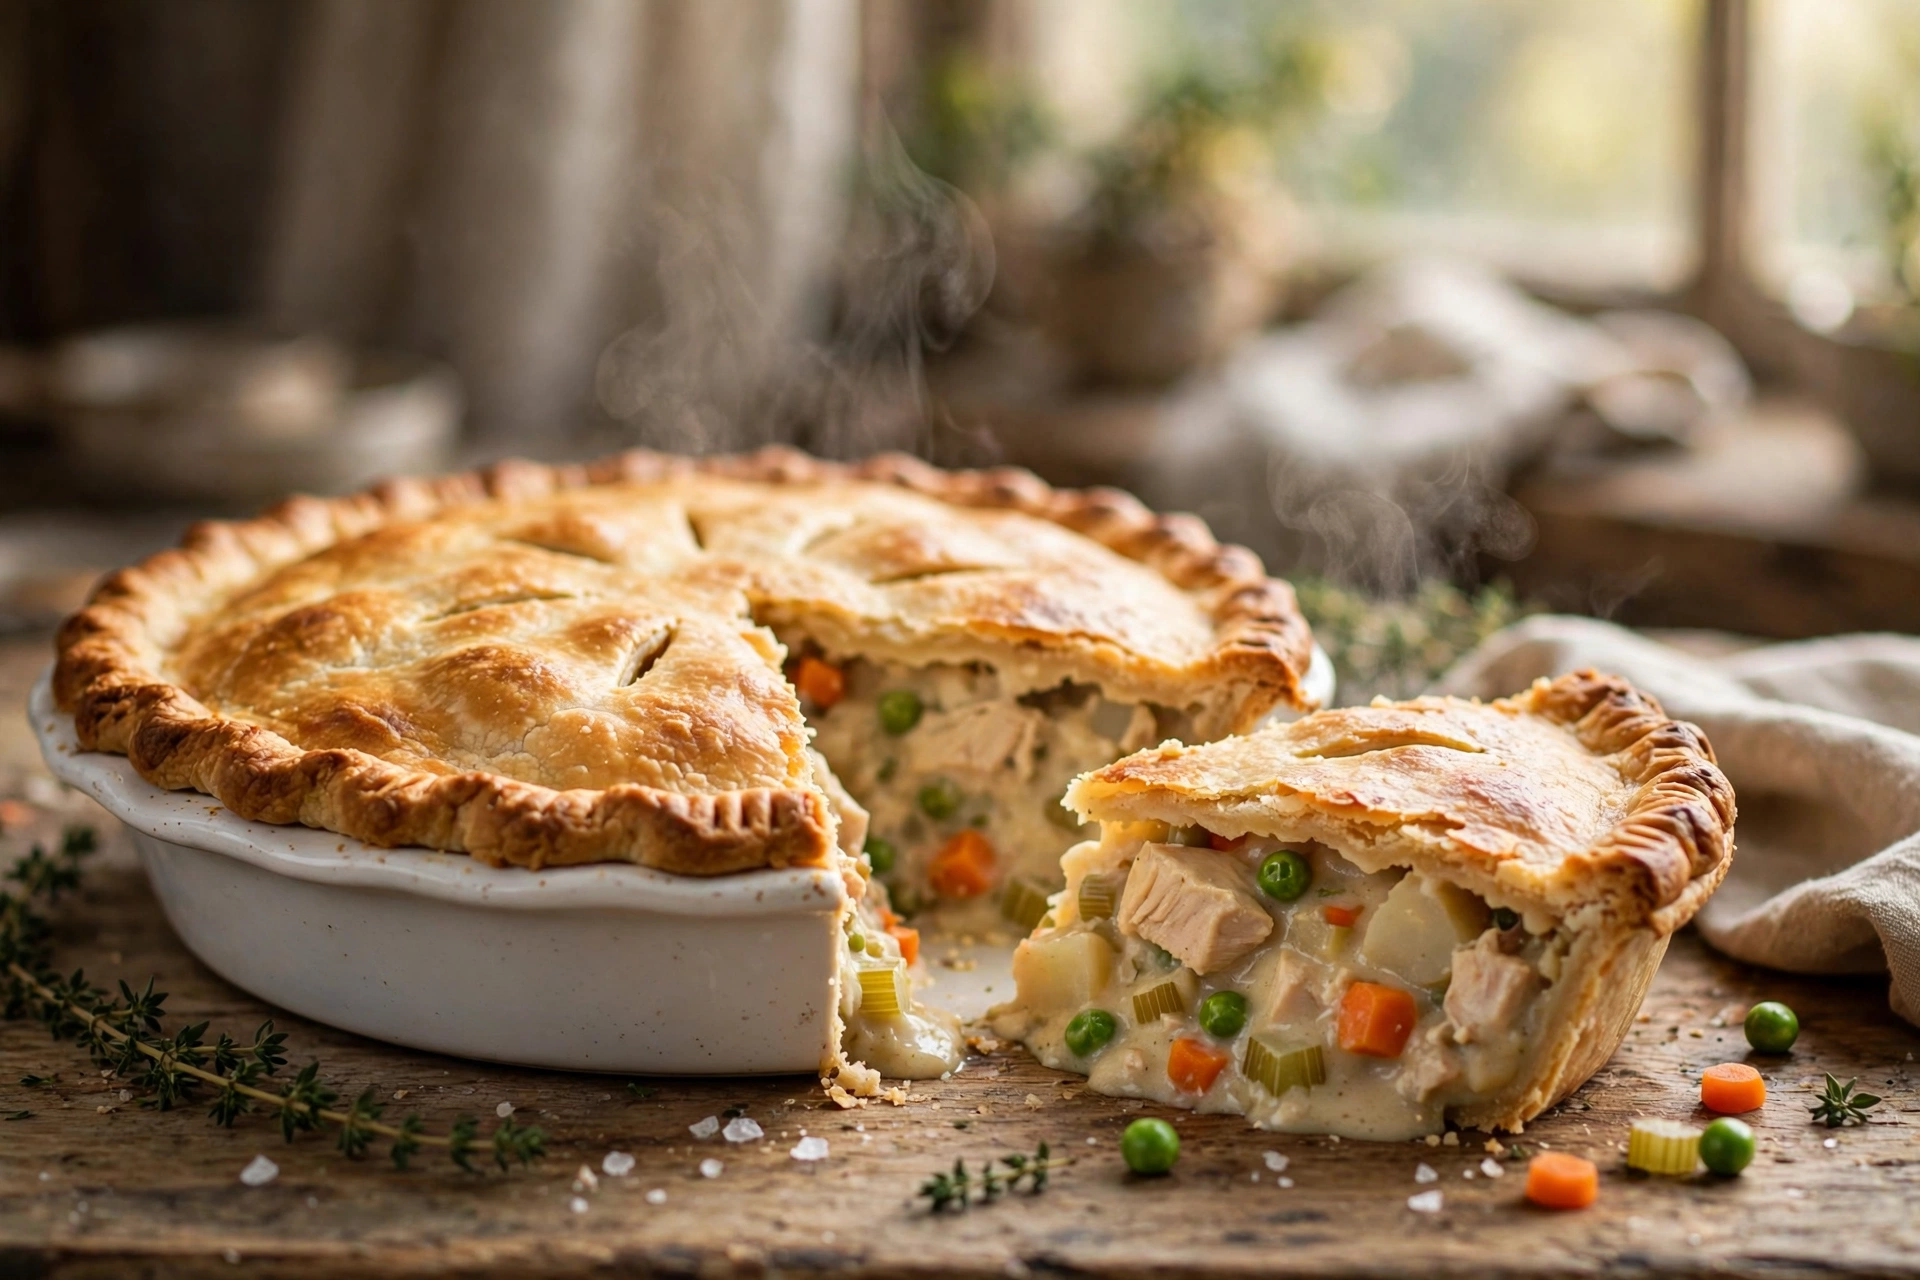
Nothing says comfort food quite like an easy homemade chicken pot pie — a golden, shatteringly flaky crust wrapped around a creamy filling of tender chicken, sweet carrots, peas, and celery. This is the version I make on repeat all fall and winter: it tastes like the nostalgic classic you grew up with, but the method is streamlined so it genuinely fits into a busy weeknight, especially if you use my rotisserie-chicken shortcut.
I tested this recipe four times before I was happy with it. The first batch had a soggy bottom crust (classic mistake). The second had a filling that was more soup than gravy. By batch three, I nailed the roux ratio and the preheated-baking-sheet trick, and batch four was the homemade-vs-store-bought crust showdown so you can choose your own adventure. Everything you need to know — including how to freeze it and reheat it so the crust stays crisp — is below.
Why You’ll Love This Recipe
- Flaky, golden crust that actually stays crisp — thanks to a hot baking sheet under the pie dish and an egg wash on top.
- Creamy filling, never watery — the flour-to-broth ratio is tested, so it sets up into a proper gravy that holds its shape when you slice.
- Weeknight-friendly — with rotisserie chicken and refrigerated pie crust, it’s about 20 minutes of hands-on work.
- Freezer champion — assemble it unbaked, freeze, and bake straight from frozen on a busy night. Full instructions below.
- Customizable — swap in turkey after Thanksgiving, add mushrooms, or go crustless-ish with a biscuit topping (see Variations).
Ingredients
Makes one 9-inch deep-dish pie (6 generous servings).
For the filling:
- 3 cups cooked chicken, shredded or diced (a store rotisserie chicken is perfect — see tip)
- 4 tbsp unsalted butter
- 1 medium yellow onion, diced
- 2 medium carrots, peeled and sliced into ¼-inch coins
- 2 celery stalks, diced
- 1 medium russet potato, peeled and cut into ½-inch cubes (optional but recommended — it makes the filling heartier)
- ⅓ cup all-purpose flour
- 2 cups low-sodium chicken broth, warmed
- ¾ cup whole milk or half-and-half
- 1 cup frozen peas (no need to thaw)
- 1 tsp dried thyme (or 1 tbsp fresh)
- ½ tsp garlic powder
- Salt and freshly ground black pepper, to taste
- 1 tsp fresh lemon juice (my secret — brightens the whole filling)
For the crust:
- 2 refrigerated pie crusts (one 14-oz package), OR one batch of your favorite homemade double crust
- 1 large egg beaten with 1 tbsp milk, for the egg wash
- Flaky sea salt, for sprinkling (optional)
Ingredient tips: Warm broth incorporates into the roux far more smoothly than cold broth — I just microwave it for 90 seconds. For the chicken, rotisserie is the move on weeknights, but poached chicken breasts work too; just don’t use canned chicken, which turns mushy. If you’re using homemade crust, keep everything ice-cold and don’t overwork the dough — visible butter flecks are what make it flaky. And please use real butter, not margarine, for the roux; the flavor difference is noticeable. If weeknight comfort food is your thing, you’ll also love my Instant Pot Chicken and Dumplings for another cozy chicken dinner.
How to Make It
Step 1: Prep and preheat
Place a heavy rimmed baking sheet on the middle rack of your oven and preheat to 400°F (204°C). The screaming-hot sheet is the anti-soggy-bottom insurance policy — the bottom crust starts setting the second the pie hits it.
Step 2: Sauté the vegetables
Melt the butter in a large deep skillet or Dutch oven over medium heat. Add the onion, carrots, celery, and potato with a good pinch of salt. Cook, stirring occasionally, for 8–10 minutes, until the onion is soft and the carrots are just starting to soften. The potatoes won’t be fully tender yet — that’s fine, they’ll finish in the oven.
Step 3: Make the roux
Sprinkle the flour over the vegetables and stir constantly for 2 full minutes. This cooks out the raw flour taste and is the step most people rush. The mixture will look pasty and smell faintly nutty — that’s your cue.
Step 4: Build the creamy filling
Slowly pour in the warm chicken broth, whisking as you go to prevent lumps. Add the milk, thyme, and garlic powder. Bring to a gentle simmer and cook 3–4 minutes, stirring, until the sauce thickens enough to coat the back of a spoon. Stir in the peas, shredded chicken, and lemon juice. Taste and season aggressively with salt and pepper — an under-seasoned filling is the number one reason pot pies taste bland. Let the filling cool for at least 15 minutes (hot filling melts the crust before it bakes).
Step 5: Assemble
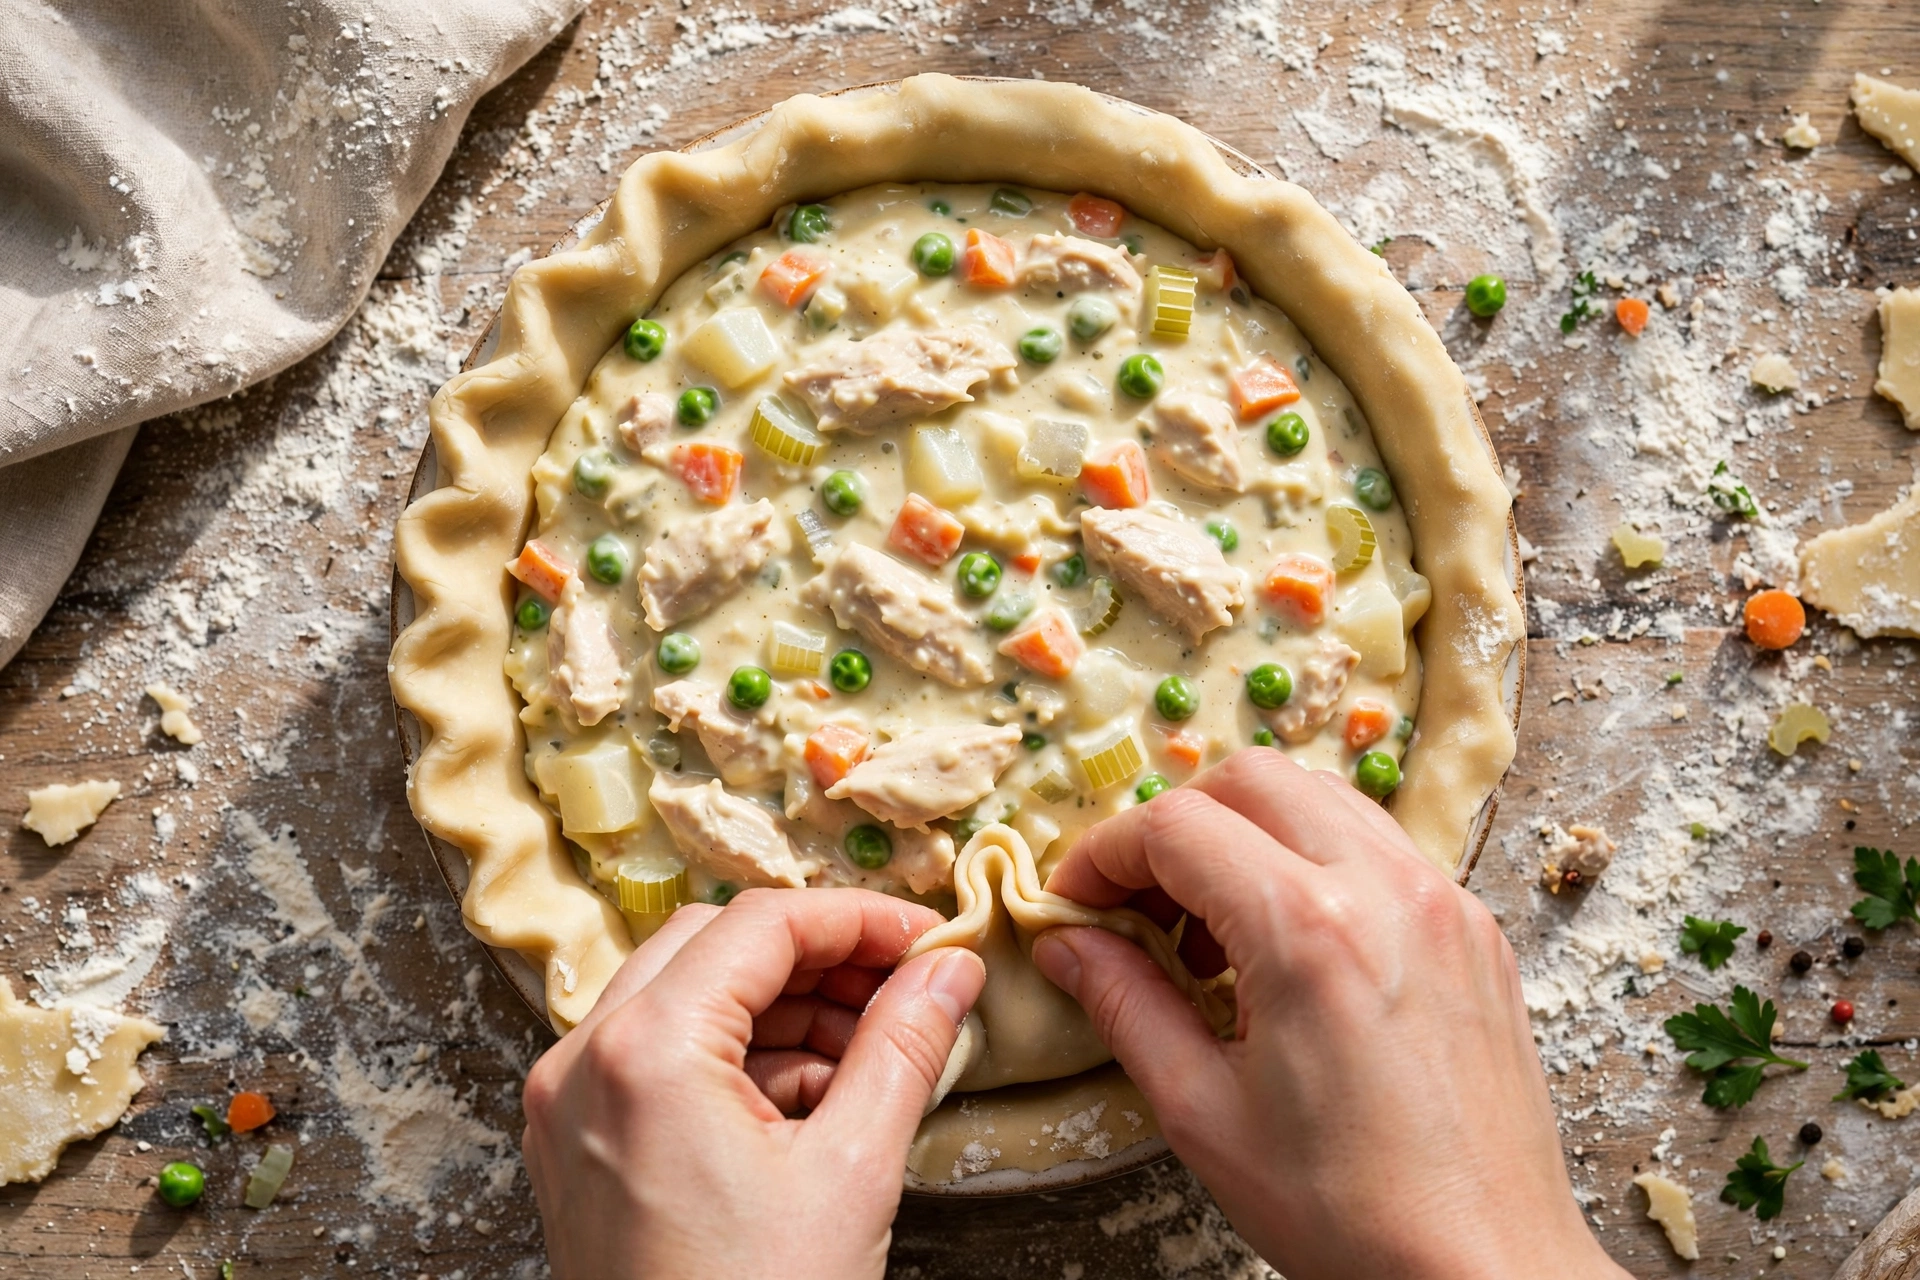
Roll your bottom crust into a 9-inch deep-dish pie plate, letting the excess hang over the edge. Pour in the cooled filling. Lay the top crust over, trim the overhang to about ½ inch, then fold the edge under and crimp with your fingers or a fork. Cut 4–5 slits in the top for steam to escape. Brush generously with egg wash and sprinkle with flaky salt if you like.
Step 6: Bake
Set the pie directly on the preheated baking sheet and bake at 400°F for 30–35 minutes, until the crust is deep golden brown and the filling is visibly bubbling through the vents. If the edges brown too fast, tent them with strips of foil at the 20-minute mark. Let the pie rest for 15 minutes before slicing — this is non-negotiable; the filling needs that time to set or it will run everywhere.
Pro Tips
- The crust showdown: homemade vs. store-bought. I baked this side by side with a homemade all-butter crust and a name-brand refrigerated crust. The homemade crust was flakier and more flavorful — no contest on a weekend. But the refrigerated crust was genuinely good, shattering-crisp on top, and cut the total time nearly in half. My verdict: store-bought for weeknights, homemade when you want to show off. Both versions are “easy” — the filling is the star either way.
- Cool the filling before assembling. I skipped this once and the bottom crust turned to paste. Fifteen minutes on the counter (or 30 in the fridge) makes all the difference.
- Don’t skip the vents. Trapped steam is the enemy of a crisp top crust. Four or five confident slits, not timid little pokes.
- Taste the filling before it goes in the pie. It should taste slightly over-seasoned at this stage, because the bland crust will mellow it. If it tastes perfect now, add another pinch of salt.
- The lemon juice trick. A teaspoon of acid at the end lifts the whole filling out of “heavy” territory. You won’t taste lemon — you’ll just notice the pie tastes brighter.
Variations
- Turkey pot pie: Swap the chicken for 3 cups of chopped leftover turkey. Add a splash of the turkey drippings to the roux if you have them.
- Biscuit-topped pot pie: Skip the pie crust entirely. Pour the filling into a baking dish, top with refrigerated biscuit dough, brush with butter, and bake at 375°F for 20–25 minutes.
- Mushroom lover’s: Add 8 oz sliced cremini mushrooms with the onions and cook until their liquid evaporates before adding the flour.
- Dairy-free: Use olive oil or dairy-free butter for the roux and unsweetened oat milk or broth in place of the milk. Use a vegan pie crust.
- Individual pot pies: Divide among 4–6 oven-safe ramekins, top each with a round of crust, and bake 25–30 minutes.
Storage & Meal Prep
Refrigerator: Leftover baked pie keeps 3–4 days in the fridge, covered. Reheat slices in a 350°F oven for 15–20 minutes (the microwave works but the crust goes soft).
Freezing (unbaked — my preferred method): Assemble the pie completely but skip the egg wash. Wrap tightly in two layers of plastic wrap plus a layer of foil. Freeze up to 3 months. Bake straight from frozen: brush with egg wash, place on the preheated baking sheet, and bake at 375°F for 55–65 minutes, tenting with foil if the top browns too early.
Freezing (baked): Cool completely, wrap well, and freeze up to 3 months. Thaw overnight in the fridge, then reheat at 350°F for 25–30 minutes until warmed through and the crust re-crisp.
Make-ahead: The filling can be made up to 2 days ahead and refrigerated. Assemble and bake when ready — just let the cold filling sit at room temperature for 20 minutes first so the bake time stays accurate. For another make-ahead comfort classic, check out my Crockpot Mississippi Pot Roast — it practically cooks itself.
FAQs
Can I use frozen pie crust?
Yes — thaw it in the fridge overnight or on the counter for about 30 minutes before unrolling. A frozen crust that’s still stiff will crack when you try to fit it into the pie plate.
How do I prevent a soggy bottom crust?
Three things: bake on a preheated baking sheet, cool the filling before assembling, and make sure the filling is properly thickened (it should coat a spoon). A glass or metal pie dish also browns the bottom better than ceramic.
Can I make chicken pot pie ahead of time?
Absolutely. Assemble it fully (hold the egg wash), refrigerate up to 24 hours, then brush with egg wash and bake as directed — add 5–10 minutes since it’s starting cold.
Rotisserie chicken vs. cooking my own?
Rotisserie wins for flavor and convenience — it’s already seasoned and juicy. If you cook your own, poach bone-in breasts in salted water with a bay leaf and don’t overcook them; dry chicken makes a dry-tasting pie.
Why is my filling runny?
Usually one of three things: the roux didn’t cook long enough, the sauce didn’t simmer long enough to thicken before the chicken went in, or the pie wasn’t rested the full 15 minutes after baking. The filling thickens considerably as it stands.
Can I use only a top crust?
Yes — pour the filling into the pie dish with no bottom crust, lay the top crust over, crimp to the rim, and bake. You’ll miss the bottom crust, but it’s faster and still delicious.
Easy Homemade Chicken Pot Pie
Prep Time: 20 minutes
Cook Time: 35 minutes
Total Time: 55 minutes (plus 15 minutes resting)
Servings: 6
Ingredients
- 3 cups cooked chicken, shredded or diced
- 4 tbsp unsalted butter
- 1 medium yellow onion, diced
- 2 medium carrots, sliced into ¼-inch coins
- 2 celery stalks, diced
- 1 medium russet potato, cut into ½-inch cubes
- ⅓ cup all-purpose flour
- 2 cups low-sodium chicken broth, warmed
- ¾ cup whole milk or half-and-half
- 1 cup frozen peas
- 1 tsp dried thyme
- ½ tsp garlic powder
- Salt and freshly ground black pepper, to taste
- 1 tsp fresh lemon juice
- 2 refrigerated pie crusts (or homemade double crust)
- 1 large egg beaten with 1 tbsp milk, for egg wash
Instructions
- Place a rimmed baking sheet on the middle oven rack; preheat oven to 400°F (204°C).
- Melt butter in a large skillet over medium heat. Sauté onion, carrots, celery, and potato with a pinch of salt for 8–10 minutes.
- Sprinkle flour over vegetables; stir constantly for 2 minutes until nutty and pasty.
- Whisk in warm broth gradually, then milk, thyme, and garlic powder. Simmer 3–4 minutes until thick enough to coat a spoon.
- Stir in peas, chicken, and lemon juice. Season well with salt and pepper. Cool filling at least 15 minutes.
- Line a 9-inch deep-dish pie plate with bottom crust; add filling. Top with second crust, crimp edges, cut vents, and brush with egg wash.
- Bake on the preheated sheet 30–35 minutes until deep golden and bubbling. Rest 15 minutes before slicing.
This easy homemade chicken pot pie has earned a permanent spot in my cold-weather rotation — it’s the kind of dinner that makes the whole house smell incredible and has everyone hovering near the oven. Whether you go homemade or store-bought on the crust, that creamy filling and shattering top crust never disappoint. If you try the freezer method, I’d love to hear how it worked for you!
If you enjoyed this recipe, you’ll also love my 15-Minute Peanut Butter Noodle Stir-Fry with Frozen Vegetables.