
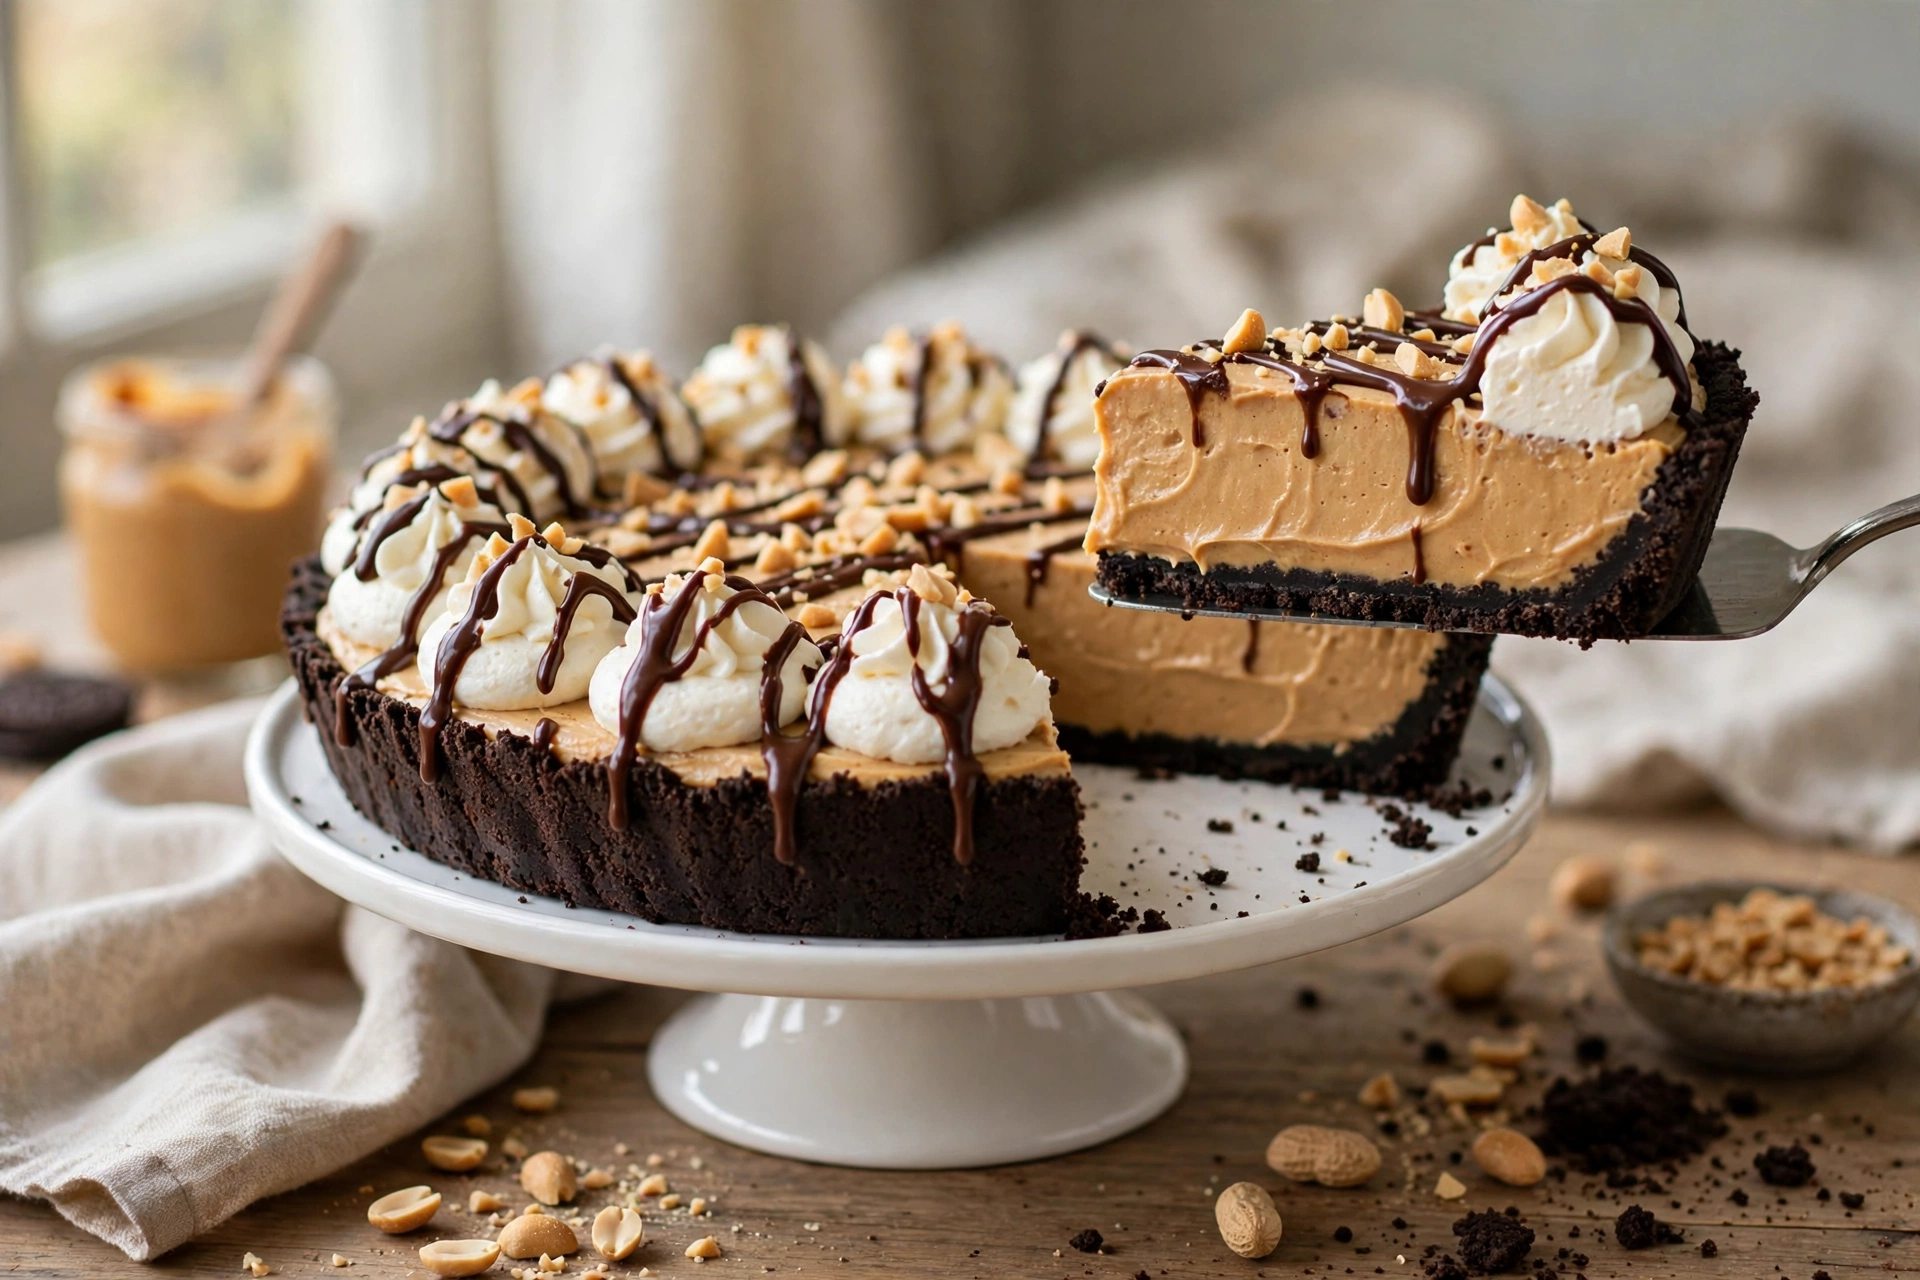
Some desserts earn their place through sheer effortlessness. This no bake peanut butter pie is one of them: a crunchy chocolate Oreo crust, a silky cloud of peanut butter–cream cheese filling, and a billow of whipped cream on top — with exactly 15 minutes of actual work and zero oven time. It’s the pie I bring to summer cookouts, the one I make when the in-laws are coming in two hours, and the one that disappears before the coffee’s poured.
I’ve made this pie more times than I can count, and I’ve learned the two things that separate a good peanut butter pie from a great one: pressing the crust correctly so it slices cleanly instead of crumbling, and the hot-knife trick for picture-perfect slices. Both are below, along with topping variations that take it from classic to showstopper.
Why You’ll Love This Recipe
- 15 minutes of prep, no oven — ideal for hot days, busy days, and “I forgot I volunteered dessert” days.
- Oreo crust + peanut butter = unbeatable combo — chocolate and peanut butter is a classic for a reason.
- Silky, not dense — the whipped cream folded into the filling keeps it light and mousse-like.
- Make-ahead hero — it needs chilling time anyway, so it’s designed to be made ahead.
- Crowd-pleaser — I’ve never brought home leftovers. Ever.
Ingredients
Serves 8–10.
For the Oreo crust:
- 24 Oreo cookies (about 1 standard package row — 2½ cups crumbs)
- 5 tbsp unsalted butter, melted
For the peanut butter filling:
- 8 oz cream cheese, softened to room temperature
- 1 cup creamy peanut butter (not natural-style — see tip)
- ¾ cup powdered sugar
- 1 tsp vanilla extract
- ¼ tsp salt
- 1½ cups heavy whipping cream, whipped to stiff peaks (or 1½ cups whipped topping)
For the topping:
- Remaining whipped cream, for spreading or piping
- ¼ cup hot fudge sauce, warmed, for drizzling
- 2 tbsp chopped salted peanuts
- 4–5 mini peanut butter cups, halved (optional but delightful)
Ingredient tips: Use regular commercial creamy peanut butter (like Jif or Skippy), NOT natural-style. Natural peanut butter’s separated oils make the filling greasy and runny — I learned this the hard way with a pie that never fully set. The cream cheese must be genuinely room temperature; cold cream cheese = lumpy filling no matter how long you beat it. Leave it on the counter for a full hour. For the Oreos, use the whole cookie — filling and all. The cream center helps the crust bind. And whip the heavy cream to firm, stiff peaks; under-whipped cream deflates in the filling. If chocolate-peanut butter is your love language, my Churro Cheesecake Bars are another no-fail crowd dessert.
How to Make It
Step 1: Make the Oreo crust
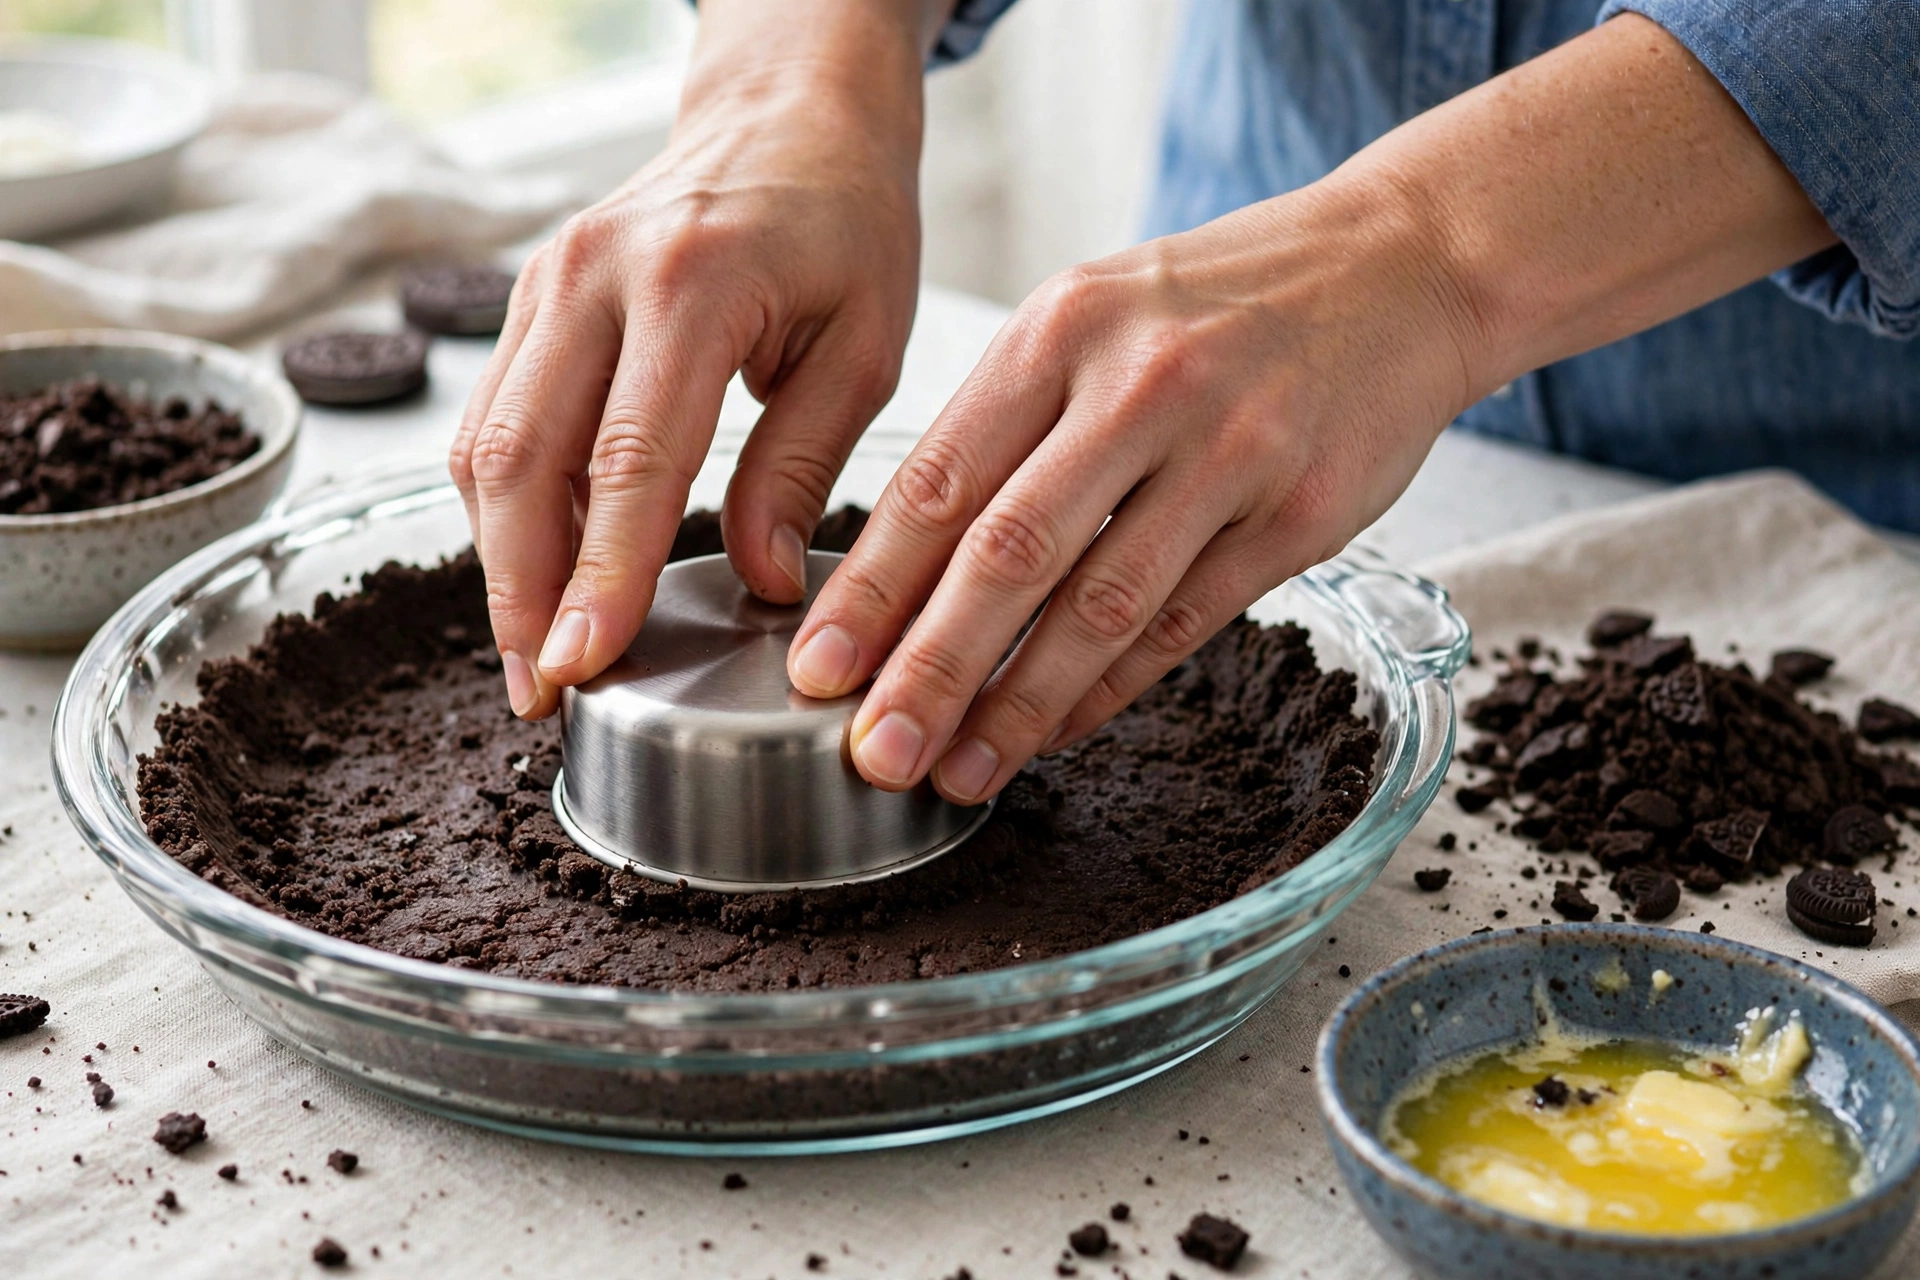
Add the Oreos (whole — filling included) to a food processor and pulse into fine crumbs. You want them quite fine, like wet sand — coarse chunks make a crumbly crust. Drizzle in the melted butter and pulse until the mixture holds together when squeezed. Press into a 9-inch pie dish: start with the bottom, then work up the sides, using the flat bottom of a measuring cup to compact it firmly and evenly. This firm pressing is the entire secret to a crust that slices cleanly (more in Pro Tips). Freeze the crust for 15 minutes while you make the filling — a cold crust sets up firmer.
Step 2: Make the peanut butter filling
In a large bowl, beat the softened cream cheese with an electric mixer until completely smooth — no lumps, about 1 minute. Add the peanut butter, powdered sugar, vanilla, and salt; beat until smooth and fluffy, scraping the bowl once. The mixture will be thick.
Step 3: Fold in the whipped cream
Add about a third of the whipped cream to the peanut butter mixture and stir it in to lighten the base. Then add the remaining whipped cream and fold gently with a spatula — cut down the middle, scoop under, fold over — until just combined with no white streaks. Don’t stir or beat; you want to keep all that airy volume. The filling should look like a thick, silky mousse.
Step 4: Fill and chill
Spoon the filling into the cold crust and smooth the top. Refrigerate for at least 4 hours, but overnight is better — the pie needs this time to firm up fully for clean slices. Cover loosely with plastic wrap once the top is set (about 1 hour in) so it doesn’t absorb fridge odors.
Step 5: Top and serve
Spread or pipe additional whipped cream over the chilled pie. Drizzle with warm (not hot) hot fudge, sprinkle with chopped peanuts, and dot with halved mini peanut butter cups. Slice with a hot knife (see Pro Tips) and serve cold.
Pro Tips
- The crust-pressing technique: A loosely pressed crust shatters when sliced — the number one complaint about no-bake pies. Press the crumbs firmly and evenly with a flat-bottomed measuring cup, going slightly thicker on the bottom than the sides. Then freeze 15 minutes minimum. A well-pressed, well-chilled crust cuts like a dream.
- The hot-knife clean-slice trick: Fill a tall glass with hot water. Dip a long, thin knife in, wipe it dry, and cut one slice. Repeat — dip, wipe, cut — for every single slice. The warm blade melts through the filling instead of dragging it, giving you those bakery-perfect wedges. It takes 30 extra seconds and the difference is dramatic.
- What went wrong in testing: My natural-peanut-butter experiment produced a pie that looked fine but wept oil and never firmed up, even after 24 hours. Commercial creamy peanut butter has stabilizers that keep the filling set and sliceable. This is not the place for the “just peanuts” jar.
- Room-temperature cream cheese is non-negotiable. I once tried to rush it with 10 seconds in the microwave — half-melted edges, cold center, lumpy filling. An hour on the counter. Plan ahead.
- Don’t over-sweeten. The Oreos and hot fudge bring plenty of sugar; ¾ cup powdered sugar in the filling is the tested sweet spot. More makes it cloying.
Variations
- Chocolate peanut butter: Add ¼ cup cocoa powder to the filling and use a chocolate drizzle instead of hot fudge. Double chocolate territory.
- Nutter Butter crust: Swap Oreos for Nutter Butters for an all-peanut-butter pie. Reduce the butter to 4 tbsp since the cookies are oilier.
- Frozen peanut butter pie: Freeze the finished pie (without fresh whipped cream topping) for a firmer, ice-cream-like slice. Top after thawing 15 minutes.
- Pretzel crust: Swap Oreos for crushed pretzels + ¼ cup sugar for a sweet-salty base that plays beautifully with peanut butter.
- Mini pies: Press the crust into a muffin tin (makes 12) and divide the filling — perfect for parties and portion control.
Storage & Meal Prep
Refrigerator: The finished pie keeps 4–5 days, covered, in the fridge. Add the whipped cream topping the day you serve it for the freshest look, though it’s fine made fully ahead.
Freezing: This pie freezes excellently for up to 2 months — wrap the un-topped pie tightly in plastic wrap and foil. Thaw overnight in the fridge, then add toppings and serve. (Many people prefer it half-frozen, icebox-cake style.)
Make-ahead: This is inherently a make-ahead dessert — it needs 4+ hours of chilling anyway. Make it the night before any event and it’s one less thing to think about.
Transporting: Keep it chilled until serving. For potlucks, transport in the pie dish on a sheet pan with an ice pack underneath if it’s a warm day. If you love make-ahead holiday desserts, my Candy Cane Cheesecake Bars are another chill-and-serve winner.
FAQs
Can I use natural peanut butter?
I don’t recommend it — the separated oils make the filling greasy and prevent it from setting firmly. Use a stabilized commercial creamy peanut butter for the best texture.
Why is my filling lumpy?
The cream cheese wasn’t fully room temperature, or it wasn’t beaten smooth before the other ingredients went in. Always beat the cream cheese alone first until completely smooth.
Can I use Cool Whip instead of whipping cream?
Yes — substitute 1½ cups thawed whipped topping for the heavy cream. It’s slightly sweeter and less rich, but it works and it’s faster. (Whipped cream from scratch tastes better, in my opinion.)
How far ahead can I make this pie?
Up to 2 days ahead, refrigerated. Add the whipped cream topping and drizzles within a few hours of serving for the prettiest presentation.
Can I make this gluten-free?
Yes — use gluten-free chocolate sandwich cookies for the crust (several brands make them). The filling is naturally gluten-free.
My crust falls apart when I slice — what did I do wrong?
It wasn’t pressed firmly enough or chilled long enough. Really compact it with a measuring cup, freeze 15 minutes before filling, and chill the finished pie overnight. The hot-knife trick helps too.
No Bake Peanut Butter Pie
Prep Time: 15 minutes
Cook Time: 0 minutes
Total Time: 15 minutes (plus 4 hours chilling)
Servings: 8–10
Ingredients
- 24 Oreo cookies
- 5 tbsp unsalted butter, melted
- 8 oz cream cheese, room temperature
- 1 cup creamy peanut butter (not natural-style)
- ¾ cup powdered sugar
- 1 tsp vanilla extract
- ¼ tsp salt
- 1½ cups heavy whipping cream, whipped to stiff peaks
- Whipped cream, hot fudge, chopped peanuts, mini peanut butter cups, for topping
Instructions
- Process Oreos into fine crumbs; mix with melted butter. Press firmly into a 9-inch pie dish (bottom and sides). Freeze 15 minutes.
- Beat room-temperature cream cheese until completely smooth. Add peanut butter, powdered sugar, vanilla, and salt; beat until fluffy.
- Fold whipped cream into the peanut butter mixture in two additions, keeping it airy.
- Spoon filling into the cold crust; smooth the top. Refrigerate at least 4 hours or overnight.
- Top with whipped cream, warm hot fudge drizzle, chopped peanuts, and halved mini peanut butter cups. Slice with a hot, wiped-dry knife.
This no-bake peanut butter pie is proof that the easiest dessert in the room can also be the most requested. Fifteen minutes of work, a few hours of chilling while you do literally anything else, and you get a silky, chocolatey, peanut-buttery showstopper with bakery-clean slices. Keep the ingredients on hand — once people taste it, you’ll be making it on repeat. For another chocolatey make-ahead treat, my Chocolate Peppermint Bark is just as dangerously easy.
If you enjoyed this recipe, you’ll also love my 15-Minute Peanut Butter Noodle Stir-Fry with Frozen Vegetables.